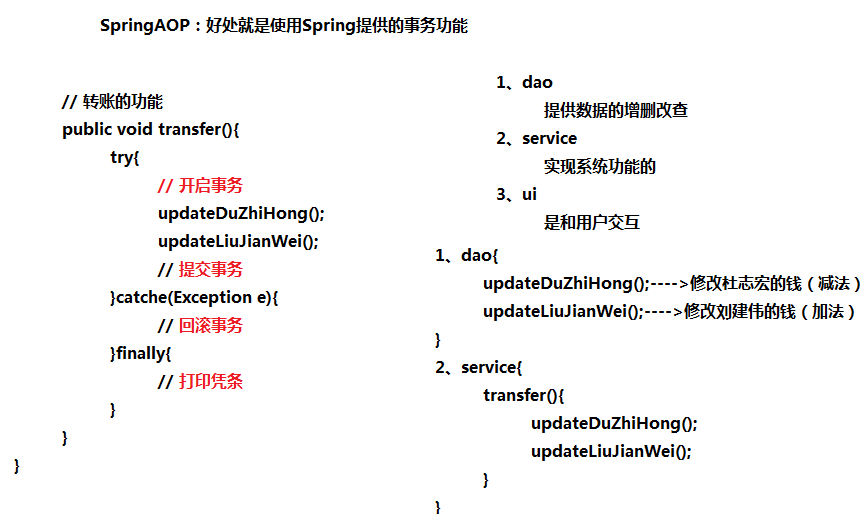
本文主要讲解关于【Spring进阶系列丨最终篇】一文详解Spring中的事务控制相关内容,让我们来一起学习下吧!
0、说明
本篇文章是【Spring进阶系列】专栏的最后一篇文章,至此,我们对Spring的学习就告一段落,接下来我会持续更新【Spring+SpringMVC+MyBatis整合】专栏,欢迎免费订阅!
文章目录
-
- 0、说明
- 一、Spring事务控制
-
- 1、事务的环境准备
-
- 1.1、导入依赖
- 1.2、添加AOP的约束
- 1.3、数据库准备
- 1.4、定义Bean
- 1.5、主配置文件定义
- 1.6、测试
- 2、基于xml的声明式事务
-
- 2.1、配置事务管理器
- 2.2、配置事务的通知
- 2.3、配置AOP
- 2.4、配置事务的属性
- 3、基于注解的声明式事务
-
- 3.1、配置事务管理器
- 3.2、在业务类添加注解
- 3.3、配置JdbcTemplate模板
- 3.4、在Dao类添加注解
- 3.5、配置类中扫描包
- 3.6、开启spring对注解事务的支持
- 3.7、在业务层@Transactional注解
- 3.8、测试
一、Spring事务控制
- 事务需要放在业务层(service)
- Spring的事务是基于AOP的
- Spring的事务控制有两种:编程式事务【了解】和声明式事务【重点】
- 声明式事务分为:基于xml配置和基于注解配置
1、事务的环境准备
1.1、导入依赖
<dependencies>

        <!-- 导入Spring的jar包-->
        <dependency>
            <groupId>org.springframework</groupId>
            <artifactId>spring-context</artifactId>
            <version>5.2.1.RELEASE</version>
        </dependency>

        <!-- 添加对AOP的支持  -->
        <dependency>
            <groupId>org.aspectj</groupId>
            <artifactId>aspectjweaver</artifactId>
            <version>1.9.4</version>
        </dependency>

        <!-- 事务的jar包    -->
        <dependency>
            <groupId>org.springframework</groupId>
            <artifactId>spring-tx</artifactId>
            <version>5.2.1.RELEASE</version>
        </dependency>

        <!-- 数据库驱动  -->
        <dependency>
            <groupId>mysql</groupId>
            <artifactId>mysql-connector-java</artifactId>
            <version>5.1.48</version>
        </dependency>

  		<!-- 操作数据库的支持	-->
  		<dependency>
            <groupId>org.springframework</groupId>
            <artifactId>spring-jdbc</artifactId>
            <version>5.2.1.RELEASE</version>
        </dependency>

        <!--  单元测试框架  -->
        <dependency>
            <groupId>junit</groupId>
            <artifactId>junit</artifactId>
            <version>4.12</version>
            <scope>test</scope>
        </dependency>
</dependencies>
1.2、添加AOP的约束
<beans xmlns="http://www.springframework.org/schema/beans"
       xmlns:xsi="http://www.w3.org/2001/XMLSchema-instance"
       xmlns:context="http://www.springframework.org/schema/context"
       xmlns:aop="http://www.springframework.org/schema/aop"
       xmlns:tx="http://www.springframework.org/schema/tx"
       xsi:schemaLocation="http://www.springframework.org/schema/beans
        https://www.springframework.org/schema/beans/spring-beans.xsd
        http://www.springframework.org/schema/context
        https://www.springframework.org/schema/context/spring-context.xsd
        http://www.springframework.org/schema/tx
        https://www.springframework.org/schema/tx/spring-tx.xsd
        http://www.springframework.org/schema/aop
        http://www.springframework.org/schema/aop/spring-aop.xsd">
</beans>
1.3、数据库准备
create database bank;

use bank;

create table t_account(
	id int primary key auto_increment,
  	name varchar(30),
  	balance int
);

insert into t_account(name,balance) values('段康家',2000);
insert into t_account(name,balance) values('彭依凝',2000);
1.4、定义Bean
// 定义实体
public class Account {

    private Integer id;

    private String name;

    private Integer balance;
}
// 业务接口
public interface AccountService {

    public void transfer(Integer srcId,Integer destId,Integer money);

}
public class AccountServiceImpl implements AccountService {

    @Override
    public void transfer(Integer srcId, Integer destId, Integer money) {
        // 源账号
        Account srcAccount = accountDao.selectById(srcId);
        Integer srcBalance = srcAccount.getBalance();
        srcAccount.setBalance(srcBalance - money);

        accountDao.updateById(srcAccount);

        // 目标账号
        Account destAccount = accountDao.selectById(destId);
        Integer destBalance = destAccount.getBalance();
        destAccount.setBalance(destBalance + money);

        accountDao.updateById(destAccount);
    }
}
// dao接口
public interface AccountDao {

    public Account selectById(Integer id);

    public void updateById(Account account);

}
// dao实现类
public class AccountDaoImpl implements AccountDao {
    @Override
    public Account selectById(Integer id) {

        String sql = "select id,name,balance from t_account where id = ?";

        List<Account> accounts = getJdbcTemplate().query(sql,new BeanPropertyRowMapper<Account>(Account.class),id);

        return accounts.get(0);
    }

    @Override
    public void updateById(Account account) {

        String sql = "update t_account set balance = ? where id = ?";

        getJdbcTemplate().update(sql,account.getBalance(),account.getId());
    }
}
1.5、主配置文件定义
<beans>
	<!-- 配置Dao层-->
    <bean id="accountDao" class="cn.bdqn.dao.impl.AccountDaoImpl">
        <property name="dataSource" ref=""/>
    </bean>

    <!-- 配置业务层-->
    <bean id="accountService" class="cn.bdqn.service.impl.AccountServiceImpl">
        <property name="accountDao" ref="accountDao"></property>
    </bean>

    <!-- 配置数据源  -->
    <bean id="dataSource" 																class="org.springframework.jdbc.datasource.DriverManagerDataSource">
        <property name="driverClassName" value="com.mysql.jdbc.Driver"></property>
        <property name="url" value="jdbc:mysql:///bank"></property>
        <property name="username" value="root"></property>
        <property name="password" value="root"></property>
    </bean>

</beans>
1.6、测试
@Test
public void testTransfer() throws Exception{

        ApplicationContext ac = new ClassPathXmlApplicationContext("beans.xml");
        AccountService accountService = (AccountService) ac.getBean("accountService");
        accountService.transfer(1,2,100);
}
2、基于xml的声明式事务
2.1、配置事务管理器
<!--  1、配置事务管理器  -->
<bean id="transactionManager" 																																		class="org.springframework.jdbc.datasource.DataSourceTransactionManager">
        <property name="dataSource" ref="dataSource"/>
</bean>
2.2、配置事务的通知
 <!-- 2、配置事务的通知  -->
<tx:advice id="txAdvice" transaction-manager="transactionManager"/>
2.3、配置AOP
重点是配置切入点表达式及事务通知和切入点表达式的关系
<!-- 3、开启配置AOP 配置切入点表达式及事务通知和切入点表达式的关系-->
<aop:config>
        <aop:pointcut id="pt" expression="execution(* cn.bdqn.service.impl.*.*(..))"/>
        <aop:advisor advice-ref="txAdvice" pointcut-ref="pt"/>
</aop:config>
2.4、配置事务的属性
注意:事务的属性在tx:advice标签的内部。
isolation:用于指定事务的隔离级别。默认值是DEFAULT,表示使用数据库的默认隔离级别。
propagation:用于指定事务的传播行为。默认值是REQUIRED,表示一定会有事务,增删改的选择。查询方法可以选择SUPPORTS。
read-only:用于指定事务是否只读。只有查询方法才能设置为true。默认值是false,表示读写。
timeout:用于指定事务的超时时间,默认值是-1,表示永不超时。如果指定了数值,以秒为单位。
rollback-for:用于指定一个异常,当产生该异常时,事务回滚,产生其他异常时,事务不回滚。没有默认值。表示任何异常都回滚。
no-rollback-for:用于指定一个异常,当产生该异常时,事务不回滚,产生其他异常时事务回滚。没有默认值。表示任何异常都回滚。
<!-- 2、配置事务的通知  -->
<tx:advice id="txAdvice" transaction-manager="transactionManager">
   <!-- 配置事务的属性-->
   <tx:attributes>
        <tx:method name="transfer" isolation="DEFAULT" propagation="REQUIRED"
                   read-only="false"/>
   </tx:attributes>
</tx:advice>
3、基于注解的声明式事务
3.1、配置事务管理器
<!--  1、配置事务管理器  -->
<bean id="transactionManager" 																																				class="org.springframework.jdbc.datasource.DataSourceTransactionManager">
        <property name="dataSource" ref="dataSource"/>
</bean>
3.2、在业务类添加注解
@Service("accountService")
public class AccountServiceImpl implements AccountService {

    @Autowired
    private AccountDao accountDao;
3.3、配置JdbcTemplate模板
<bean id="jdbcTemplate" class="org.springframework.jdbc.core.JdbcTemplate">
    <property name="dataSource" ref="dataSource"/>
</bean>
3.4、在Dao类添加注解
@Repository("accountDao")
public class AccountDaoImpl implements AccountDao {

    @Autowired
    private JdbcTemplate jdbcTemplate;
}
3.5、配置类中扫描包
<context:component-scan base-package="cn.bdqn"/>
3.6、开启spring对注解事务的支持
<tx:annotation-driven transaction-manager="transactionManager"/>
3.7、在业务层@Transactional注解
@Service("accountService")
@Transactional
public class AccountServiceImpl implements AccountService {

    @Autowired
    private AccountDao accountDao;
}
3.8、测试
@Test
public void testTransfer() throws Exception{

        ApplicationContext ac = new ClassPathXmlApplicationContext("beans.xml");
        AccountService accountService = (AccountService) ac.getBean("accountService");
        accountService.transfer(1,2,100);
}
以上就是关于【Spring进阶系列丨最终篇】一文详解Spring中的事务控制相关的全部内容,希望对你有帮助。欢迎持续关注程序员导航网,学习愉快哦!
暂无评论...


